相关链接: 易百教程 、Nginx 安装配置 、 Nginx 服务器安装及配置文件详解 、 Nginx 配置详解
官方链接: Nginx文档 (所有模块及其包含的指令) 、 nginx news 、 nginx软件包(稳定版和主线版) 、 nginx源码 、 nginx源码库
推荐连接: Nginx中文文档
本文使用 Centos 7。
常用配置 vim /opt/local/nginx/conf/nginx.conf
1 2 3 4 5 6 7 8 9 10 11 12 13 14 15 16 17 18 19 20 21 22 23 24 25 26 27 28 29 30 31 32 33 34 35 36 37 38 39 40 41 42 43 44 45 46 47 48 49 50 51 52 53 54 55 56 57 58 59 60 61 62 63 64 65 66 67 68 69 70 71 72 73 74 75 76 77 78 79 80 81 82 83 84 85 86 87 88 89 90 91 92 93 94 95 96 97 98 99 100 101 102 103 104 105 106 107 108 109 110 111 112 113 114 115 116 117 118 119 120 121 122 123 124 125 126 127 128 worker_processes 1 ;events { worker_connections 1024 ; } stream { server { listen 8998 ; proxy_connect_timeout 1s ; proxy_timeout 3s ; proxy_pass 10.27.142.86:3306 ; } } http { include mime.types; default_type application/octet-stream; sendfile on ; keepalive_timeout 65 ; server { listen 80 ; server_name localhost; location / { root html; index index.html index.htm; } error_page 500 502 503 504 /50x.html; location = /50x.html { root html; } } }
功能简介 Nginx (发音同engine x)是异步框架的网页服务器(HTTP服务器/Web服务器) ,也是反向代理 服务器、负载平衡器 、邮件代理服务器,以及Igor Sysoev最初编写的通用TCP/UDP代理服务器。
基本的HTTP服务器功能
其他HTTP服务器功能
邮件代理服务器功能
TCP/UDP代理服务器功能
架构和可扩展性
特别 Nginx不同之处在于,其使用可扩展的事件驱动架构 ,而不是更传统的过程驱动架构。 这需要更低的内存占用,并且当并发连接扩大时,使内存使用更可预测。
Nginx的核心功能(具有高性能 HTTP和反向代理服务器,具有很好的控制访问和带宽能力,可以与各种应用程序高效集成),大大提高了Nginx的性能(可扩展性、可靠性),有助于使其成为任何网站或服务器的首选。
在传统的Web服务器体系结构中,每个客户端连接作为一个单独的进程或线程处理,随着网站的流行度增加,并发连接数量的增加,Web服务器减慢,延迟了对用户的响应。
从技术的角度来看,产生一个单独的进程/线程需要将CPU切换到新的任务并创建一个新的运行时上下文,消耗额外的内存和CPU时间,从而对性能产生负面影响。
Nginx开发的目标是实现10倍以上的性能,优化服务器资源的使用,同时也能够扩展和支持网站的动态增长。 因此,Nginx成为最知名的模块化,事件驱动,异步,单线程Web服务器和Web代理之一。
优点 Nginx 是一个高性能的 Web 和反向代理服务器, 它具有有很多非常优越的特性:
作为 Web 服务器 :相比 Apache,Nginx 使用更少的资源,支持更多的并发连接,体现更高的效率,这点使 Nginx 尤其受到虚拟主机提供商的欢迎。能够支持高达 50,000 个并发连接数的响应,感谢 Nginx 为我们选择了 epoll and kqueue 作为开发模型.
作为负载均衡服务器 :Nginx 既可以在内部直接支持 Rails 和 PHP,也可以支持作为 HTTP代理服务器 对外进行服务。Nginx 用 C 编写, 不论是系统资源开销还是 CPU 使用效率都比 Perlbal 要好的多。
作为邮件代理服务器 : Nginx 同时也是一个非常优秀的邮件代理服务器(最早开发这个产品的目的之一也是作为邮件代理服务器),Last.fm 描述了成功并且美妙的使用经验。
Nginx 安装非常简单,配置文件非常简洁(还能够支持perl语法),启动特别容易,并且几乎可以做到7*24不间断运行,即使运行数个月也不需要重新启动,Bugs非常少。还能够在不间断服务的情况下进行软件版本的升级。
代码结构
工作模式
nginx进程角色
nginx缓存简介
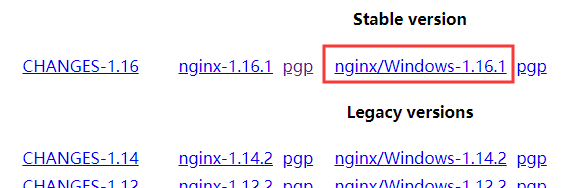
关于Windows版本的nginx 当nginx在Windows环境中工作时,nginx的Windows版本更像是一个概念证明,而不是一个功能完整的端口。 在这个时候,nginx和Windows内核架构有一些不能很好地交互的局限性。 用于Windows的nginx版本的已知问题包括并发连接数量低得多,性能下降,无缓存,无带宽监管。 nginx for Windows的未来版本将更加紧密地匹配主流功能。
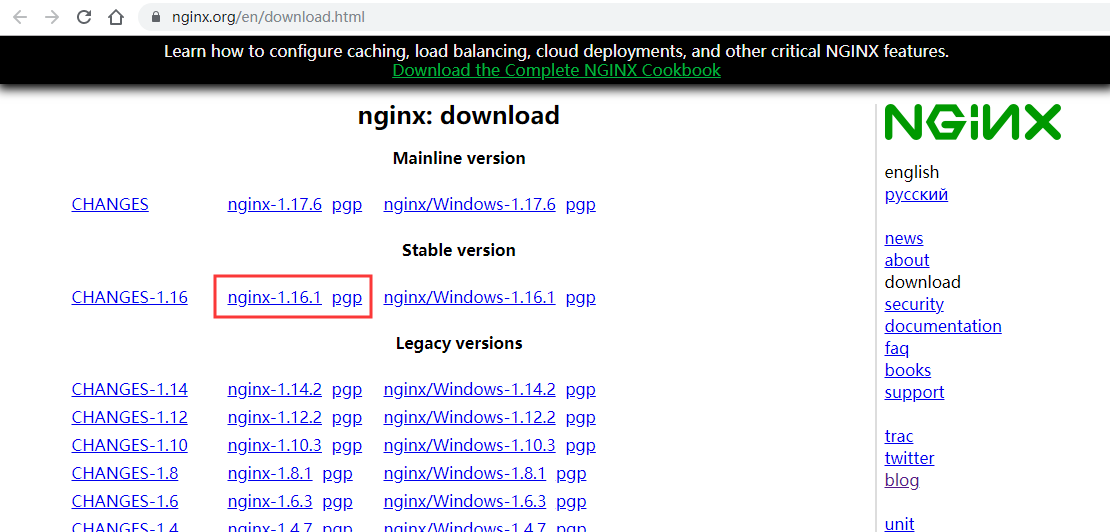
Windows版下载地址: https://nginx.org/en/download.html
解压后运行 nginx.exe 文件启动。
也可以添加为服务,略…
Linux下安装 基于 Centos 7 64bit 系统
从源安装 CentOS、Ubuntu等安装最新稳定版和主线版方法: https://nginx.org/en/linux_packages.html
命令整合 grep命令 、 ps命令 、 systemctl命令 = service命令 + chkconfig命令
1
2
3
4
5
6
7
8
9
10
11
12
13
14
15
16
17
18
19
20
21
22
23
24
25
26
27
28
29
30
31
32
33
34
35
36
37
38
39
40
41
42
43
44
45
46
47
48
49
50
51
52
53
54
[root@localhost ~]# yum -y update [root@localhost ~]# sudo yum install nginx [root@localhost ~]# yum -y install epel-release # 如果源中没有nginx包,安装epel源 # 查看版本 [root@localhost ~]# nginx -v [root@localhost ~]# /usr/sbin/nginx -v # 编辑配置文件,并验证配置 [root@localhost ~]# vim /etc/nginx/nginx.conf [root@localhost ~]# nginx -t -c /etc/nginx/nginx.conf [root@localhost ~]# /usr/sbin/nginx -t -c /etc/nginx/nginx.conf nginx: the configuration file /etc/nginx/nginx.conf syntax is ok nginx: configuration file /etc/nginx/nginx.conf test is successful # 查看环境变量 [root@localhost ~]# echo $PATH [root@localhost ~]# env # 查看服务状态 [root@localhost ~]# service nginx status [root@localhost ~]# systemctl status nginx.service [root@localhost ~]# systemctl is-active nginx.service [root@localhost ~]# systemctl list-units --type=service | grep nginx # 启动服务 [root@localhost ~]# nginx -c /etc/nginx/nginx.conf # 此命令在环境变量中 [root@localhost ~]# service nginx start [root@localhost ~]# systemctl start nginx.service # 重启服务 [root@localhost ~]# nginx -s reload # 重新加载配置,此命令在环境变量中,不会中断当前请求的处理 [root@localhost ~]# service nginx restart [root@localhost ~]# systemctl restart nginx.service # 停止服务 [root@localhost ~]# nginx -s quit # 此命令在环境变量中 [root@localhost ~]# nginx -s stop # 此命令在环境变量中 [root@localhost ~]# service nginx stop [root@localhost ~]# systemctl stop nginx.service [root@localhost nginx-1.26.3]# kill -QUIT PPID # 从容停止 [root@localhost nginx-1.26.3]# kill -TERM PPID # 快速停止 [root@localhost nginx-1.26.3]# kill PPID # 强制终止 # 服务自启 [root@localhost ~]# chkconfig --level 3 nginx on [root@localhost ~]# systemctl enable nginx.service # 服务不自启 [root@localhost ~]# chkconfig --level 3 nginx off [root@localhost ~]# systemctl disable nginx.service # 查看进程状态 [root@localhost ~]# ps -ef | grep nginx [root@localhost nginx-1.26.3]# curl localhost:80
查看目录或文件位置 Linux 系统目录结构
whereis命令 、 locate/slocate命令 、 find命令 、 which命令 、 rpm命令
1
2
3
4
5
6
7
8
9
10
11
12
13
14
15
16
17
18
19
20
21
22
23
24
25
26
27
28
29
30
31
32
33
34
35
36
37
38
39
40
41
42
43
44
45
46
47
48
49
50
[root@localhost ~]# locate nginx [root@localhost ~]# find / | grep nginx [root@localhost home]# rpm -ql nginx /etc/logrotate.d/nginx /etc/nginx/fastcgi.conf /etc/nginx/fastcgi.conf.default /etc/nginx/fastcgi_params /etc/nginx/fastcgi_params.default /etc/nginx/koi-utf /etc/nginx/koi-win /etc/nginx/mime.types /etc/nginx/mime.types.default /etc/nginx/nginx.conf /etc/nginx/nginx.conf.default /etc/nginx/scgi_params /etc/nginx/scgi_params.default /etc/nginx/uwsgi_params /etc/nginx/uwsgi_params.default /etc/nginx/win-utf /usr/bin/nginx-upgrade /usr/lib/systemd/system/nginx.service /usr/lib64/nginx/modules /usr/sbin/nginx /usr/share/doc/nginx-1.26.3 /usr/share/doc/nginx-1.26.3/CHANGES /usr/share/doc/nginx-1.26.3/README /usr/share/doc/nginx-1.26.3/README.dynamic /usr/share/doc/nginx-1.26.3/UPGRADE-NOTES-1.6-to-1.10 /usr/share/licenses/nginx-1.26.3 /usr/share/licenses/nginx-1.26.3/LICENSE /usr/share/man/man3/nginx.3pm.gz /usr/share/man/man8/nginx-upgrade.8.gz /usr/share/man/man8/nginx.8.gz /usr/share/nginx/html/404.html /usr/share/nginx/html/50x.html /usr/share/nginx/html/en-US /usr/share/nginx/html/icons /usr/share/nginx/html/icons/poweredby.png /usr/share/nginx/html/img /usr/share/nginx/html/index.html /usr/share/nginx/html/nginx-logo.png /usr/share/nginx/html/poweredby.png /usr/share/vim/vimfiles/ftdetect/nginx.vim /usr/share/vim/vimfiles/ftplugin/nginx.vim /usr/share/vim/vimfiles/indent/nginx.vim /usr/share/vim/vimfiles/syntax/nginx.vim /var/lib/nginx /var/lib/nginx/tmp /var/log/nginx [root@localhost home]#
编译安装 命令整合 1 2 3 4 5 6 7 8 9 10 11 12 13 14 15 16 17 18 19 20 21 22 23 24 25 26 27 28 29 30 31 32 33 34 35 36 37 38 39 40 41 42 43 44 45 46 47 48 49 50 51 52 53 54 55 56 57 58 59 60 61 62 63 64 65 66 67 68 69 70 71 72 73 74 75 76 77 78 79 80 81 82 83 84 85 86 87 88 89 90 91 92 93 94 95 96 97 98 99 100 101 102 103 104 105 # *************************** 前期依赖准备 *************************** # ------- centos ------- # 当安装过程提示选择全部为"yes" [root@localhost ~]# yum -y update # 安装 gcc 环境 [root@localhost ~]# yum -y install gcc-c++ # 安装 pcre 依赖库(http://www.pcre.org/) [root@localhost ~]# yum -y install pcre pcre-devel # 安装 zlib 依赖库(http://www.zlib.net) [root@localhost ~]# yum -y install zlib zlib-devel # 安装 OpenSSL 安全套接字层密码库 [root@localhost ~]# yum -y install openssl openssl-devel # ------- centos ------- # # ------- Ubuntu ------- # 更新软件包列表 [root@localhost ~]# apt-get update # 安装依赖:gcc、g++依赖库 [root@localhost ~]# apt-get install build-essential libtool # 安装 pcre 依赖库(http://www.pcre.org/) [root@localhost ~]# apt-get install libpcre3 libpcre3-dev # 安装 zlib 依赖库(http://www.zlib.net) [root@localhost ~]# apt-get install zlib1g-dev # 安装 OpenSSL 安全套接字层密码库 [root@localhost ~]# apt-get install openssl # ------- Ubuntu ------- # *************************** 前期依赖准备 *************************** # 下载解压 [root@localhost ~]# cd /home/ [root@localhost home]# wget -c https://nginx.org/download/nginx-1.26.3.tar.gz [root@localhost home]# tar -zxvf nginx-1.26.3.tar.gz # 编译安装 [root@localhost home]# cd /opt/local/nginx-1.26.3 # 生成Makefile文件。设置安装目录,默认为/usr/local/nginx [root@localhost nginx-1.26.3]# ./configure --prefix=/opt/local/nginx \ --with-http_ssl_module \ --with-http_v2_module \ --with-http_auth_request_module \ --with-http_stub_status_module \ --with-http_gzip_static_module \ --with-http_realip_module \ --with-http_sub_module \ --with-http_addition_module \ --with-http_flv_module \ --with-http_mp4_module \ --with-http_dav_module \ --with-http_secure_link_module \ --with-http_degradation_module \ --with-stream \ --with-stream_ssl_module \ --with-pcre \ --with-threads \ --with-file-aio \ --with-http_slice_module Configuration summary + using system PCRE library + using system OpenSSL library + using system zlib library nginx path prefix: "/opt/local/nginx" nginx binary file: "/opt/local/nginx/sbin/nginx" nginx modules path: "/opt/local/nginx/modules" nginx configuration prefix: "/opt/local/nginx/conf" nginx configuration file: "/opt/local/nginx/conf/nginx.conf" nginx pid file: "/opt/local/nginx/logs/nginx.pid" nginx error log file: "/opt/local/nginx/logs/error.log" nginx http access log file: "/opt/local/nginx/logs/access.log" nginx http client request body temporary files: "client_body_temp" nginx http proxy temporary files: "proxy_temp" nginx http fastcgi temporary files: "fastcgi_temp" nginx http uwsgi temporary files: "uwsgi_temp" nginx http scgi temporary files: "scgi_temp # 译并安装(会覆盖旧的二进制,但不会覆盖nginx配置 [root@localhost nginx-1.26.3]# make [root@localhost nginx-1.26.3]# make install # 查看版本 [root@localhost nginx-1.26.3]# /opt/local/nginx/sbin/nginx -v # 查看已安装模块 [root@localhost nginx-1.26.3]# /opt/local/nginx/sbin/nginx -V # 编辑配置文件,并验证配置 [root@localhost nginx-1.26.3]# vim /opt/local/nginx/conf/nginx.conf [root@localhost nginx-1.26.3]# /opt/local/nginx/sbin/nginx -t -c /etc/nginx/nginx.conf nginx: the configuration file /opt/local/nginx/conf/nginx.conf syntax is ok nginx: configuration file /opt/local/nginx/conf/nginx.conf test is successful # 启动、重启、从容停止、强制停止 [root@localhost nginx-1.26.3]# /opt/local/nginx/sbin/nginx -c /etc/nginx/nginx.conf [root@localhost nginx-1.26.3]# /opt/local/nginx/sbin/nginx -s reload # 重新加载配置,不会中断当前请求的处理 [root@localhost nginx-1.26.3]# /opt/local/nginx/sbin/nginx -s quit [root@localhost nginx-1.26.3]# /opt/local/nginx/sbin/nginx -s stop [root@localhost nginx-1.26.3]# kill -QUIT PPID # 从容停止 [root@localhost nginx-1.26.3]# kill -TERM PPID # 快速停止 [root@localhost nginx-1.26.3]# kill PPID # 强制终止 [root@localhost nginx-1.26.3]# ps -ef | grep nginx [root@localhost nginx-1.26.3]# curl localhost:80
安装准备工作 更新系统软件源,Centos yum命令
1 2 3 4 5 6 7 [root@localhost ~]# yum check-update # 检查是否有可用的更新rpm软件包 [root@localhost ~]# yum update # 更新rpm软件包 [root@localhost ~]# yum -y update # 升级所有包,改变软件设置和系统设置,系统版本内核都升级 [root@localhost ~]# yum -y upgrade # 升级所有包,不改变软件设置和系统设置,系统版本升级,内核不改变 [root@localhost ~]# yum clean # 清理yum过期的缓存 [root@localhost ~]# yum clean packages #清除缓存目录下的软件包 [root@localhost ~]# yum clean headers #清除缓存目录下的 header
下载Nginx源文件 源码下载 https://nginx.org/en/download.html ,下载并上传到服务器(这里选择最新稳定版本:nginx-1.26.3),如下图所示
命令下载 wget命令
1 2 3 4 5 6 7 [root@localhost ~]# pwd /root [root@localhost ~]# cd /home/ [root@localhost home]# wget -c https://nginx.org/download/nginx-1.26.3.tar.gz [root@localhost home]# tar -zxvf nginx-1.26.3.tar.gz
在编译之前还要做一些前期的准备工作,如:依懒包安装,Nginx用户和用户组等。
新建nginx用户及用户组 使用 root 用户身份登录系统,执行以下命令创建新的用户。
1 2 [root@localhost home]# groupadd nginx [root@localhost home]# useradd -g nginx -M nginx
useradd命令的-M参数用于不为nginx建立home目录/etc/passwd,使得nginx用户无法bash登陆(nginx用户后面由/bin/bash改为/sbin/nologin),
1 [root@localhost home]# vi /etc/passwd
然后找到有 nginx 那一行,把它修改为(后面由/bin/bash改为/sbin/nologin):
1 2 # 修改 nginx:x:1000:1000::/home/nginx:/bin/bash 为: nginx:x:1000:1000::/home/nginx:/sbin/nologin
编译配置、编译、安装 配置 下面我们进入解压的nginx源码目录:/opt/local/nginx-1.26.3/ 执行以下命令
1 2 3 4 5 6 7 8 9 10 11 12 13 14 15 16 17 18 19 20 21 22 23 24 25 26 27 28 29 30 31 32 33 34 35 36 37 38 39 40 41 42 43 44 45 46 47 48 49 50 51 52 53 54 55 56 57 58 59 60 61 62 63 64 65 66 67 68 69 70 71 72 73 74 75 76 77 78 79 [root@localhost ~]# yum -y update [root@localhost ~]# yum -y install gcc-c++ [root@localhost ~]# yum -y install pcre pcre-devel [root@localhost ~]# yum -y install zlib zlib-devel [root@localhost ~]# yum -y install openssl openssl-devel [root@localhost ~]# apt-get update [root@localhost ~]# apt-get install build-essential libtool [root@localhost ~]# apt-get install libpcre3 libpcre3-dev [root@localhost ~]# apt-get install zlib1g-dev [root@localhost ~]# apt-get install openssl [root@localhost ~]# cd /opt/local/nginx-1.26.3 [root@localhost nginx-1.26.3]# pwd /opt/local/nginx-1.26.3 [root@localhost nginx-1.26.3]# ./configure --prefix=/opt/local/nginx \ --with-http_ssl_module \ --with-http_v2_module \ --with-http_auth_request_module \ --with-http_stub_status_module \ --with-http_gzip_static_module \ --with-http_realip_module \ --with-http_sub_module \ --with-http_addition_module \ --with-http_flv_module \ --with-http_mp4_module \ --with-http_dav_module \ --with-http_secure_link_module \ --with-http_degradation_module \ --with-stream \ --with-stream_ssl_module \ --with-pcre \ --with-threads \ --with-file-aio \ --with-http_slice_module --sbin-path=/opt/local/nginx/sbin/nginx \ --conf-path=/opt/local/nginx/conf/nginx.conf \ --error-log-path=/opt/local/nginx/logs/error.log \ --http-log-path=/opt/local/nginx/logs/access.log \ --pid-path=/opt/local/nginx/run/nginx.pid \ --user=nginx \ --group=nginx Configuration summary + using system PCRE library + using system OpenSSL library + using system zlib library nginx path prefix: "/opt/local/nginx" nginx binary file: "/opt/local/nginx/sbin/nginx" nginx modules path: "/opt/local/nginx/modules" nginx configuration prefix: "/opt/local/nginx/conf" nginx configuration file: "/opt/local/nginx/conf/nginx.conf" nginx pid file: "/opt/local/nginx/logs/nginx.pid" nginx error log file: "/opt/local/nginx/logs/error.log" nginx http access log file: "/opt/local/nginx/logs/access.log" nginx http client request body temporary files: "client_body_temp" nginx http proxy temporary files: "proxy_temp" nginx http fastcgi temporary files: "fastcgi_temp" nginx http uwsgi temporary files: "uwsgi_temp" nginx http scgi temporary files: "scgi_temp"
configure 命令支持的参数
注意:上面的反斜杠 \ 表示换行继续。
--prefix=/opt/local/nginx 指定安装到 /opt/local/nginx 目录下。
编译和安装 1 2 3 4 # [root@localhost nginx-1.26.3]# make && make install [root@localhost nginx-1.26.3]# make distclean [root@localhost nginx-1.26.3]# make clean
查看程序版本 1 [root@localhost nginx-1.26.3]# /opt/local/nginx/sbin/nginx -v
查看已安装模块 1 [root@localhost nginx-1.26.3]# /opt/local/nginx/sbin/nginx -V
修改默认端口 1 [root@localhost nginx-1.26.3]# vim /opt/local/nginx/conf/nginx.conf
找到
1 2 3 4 5 6 7 8 9 ... ... #gzip on; server { listen 80; server_name localhost; #charset koi8-r; ... ...
把上面的 80 修改为你想要的端口,如:8080 。
修改配置后验证配置是否合法:
验证配置 1 2 3 [root@localhost nginx-1.26.3]# /opt/local/nginx/sbin/nginx -t -c /etc/nginx/nginx.conf nginx: the configuration file /opt/local/nginx/conf/nginx.conf syntax is ok nginx: configuration file /opt/local/nginx/conf/nginx.conf test is successful
启动、查看进程 ps 命令 、 grep命令
要启动 nginx,请运行可执行文件。
1 2 3 4 5 6 [root@localhost nginx-1.26.3]# /opt/local/nginx/sbin/nginx -c /etc/nginx/nginx.conf [root@localhost nginx-1.26.3]# ps -ef [root@localhost nginx-1.26.3]# ps -ef | grep nginx root 4092 1 0 14:51 ? 00:00:00 nginx: master process /opt/local/nginx/sbin/nginx nginx 4093 4092 0 14:51 ? 00:00:00 nginx: worker process root 4180 29309 0 14:51 pts/0 00:00:00 grep --color=auto nginx
开机自启 vim /etc/systemd/system/nginx.service
1 2 3 4 5 6 7 8 9 10 11 12 13 14 15 16 17 18 [Unit] Description= nginx server Documentation= https://zh.wikipedia.org/wiki/Systemd After=syslog.target network.target network-online.target [Service] Type= forking User= root Group=root ExecStart=/opt/local/nginx/sbin/nginx ExecReload=/opt/local/nginx/sbin/nginx -s reload ExecStop=/opt/local/nginx/sbin/nginx -s quit PIDFile=/opt/local/nginx/logs/nginx.pid [Install] WantedBy=multi-user.target
重新加载配置文件:systemctl daemon-reload
重启、停止 当nginx启动后,可以使用 -s 参数运行 nginx 命令(调用NGINX可执行文件)发送信号来控制 nginx。未添加 nginx 为服务前只能通过以下方式控制 nginx。
kill 命令 、 pkill命令
1 2 3 4 5 6 7 8 9 10 11 12 13 14 15 16 17 18 19 # nginx 管理的几种方式 # 启动 [root@localhost nginx-1.26.3]# /opt/local/nginx/sbin/nginx -c /etc/nginx/nginx.conf # 重启 [root@localhost nginx-1.26.3]# /opt/local/nginx/sbin/nginx -s reload # 重新加载配置,不会中断当前请求的处理 # 从容停止,此方式停止步骤是待nginx进程处理任务完毕进行停止。 [root@localhost nginx-1.26.3]# /opt/local/nginx/sbin/nginx -s quit # 强制停止停止,此方式相当于先查出nginx进程id 再使用kill 命令强制杀掉进程。 [root@localhost nginx-1.26.3]# /opt/local/nginx/sbin/nginx -s stop # 从容停止,4092是Nginx的主进程号(有两个进程,一个子进程一个父进程) [root@localhost nginx-1.26.3]# kill -QUIT 4092 [root@localhost nginx-1.26.3]# kill -3 4092 # 快速停止 [root@localhost nginx-1.26.3]# kill -TERM 4092 [root@localhost nginx-1.26.3]# kill -15 4092 # 强制停止 [root@localhost nginx-1.26.3]# pkill -9 nginx
测试 curl命令
简单地使用 curl 命令访问 localhost 测试
1 2 3 4 5 6 7 8 9 10 11 12 13 14 15 16 17 18 19 20 21 22 23 24 25 26 [root@localhost nginx-1.26.3]# curl localhost:80 <!DOCTYPE html> <html> <head > <title>Welcome to nginx!</title> <style> body { width: 35em; margin: 0 auto; font-family: Tahoma, Verdana, Arial, sans-serif; } </style> </head> <body> <h1>Welcome to nginx!</h1> <p>If you see this page, the nginx web server is successfully installed and working. Further configuration is required.</p> <p>For online documentation and support please refer to <a href="http://nginx.org/" >nginx.org</a>.<br/> Commercial support is available at <a href="http://nginx.com/" >nginx.com</a>.</p> <p><em>Thank you for using nginx.</em></p> </body> </html>
快速入门 启动、停止、重新加载配置 要启动 nginx,请运行可执行文件。 当nginx启动后,可以使用 -s 参数运行 nginx 命令(调用NGINX可执行文件)发送信号来控制 nginx。 使用以下语法:
1 2 # 该命令应该在启动nginx的同一用户下执行 [root@localhost ~]# nginx -s signal
信号(signal)的值可以是以下之一:
stop - 立即关闭服务(快速关闭)quit - 正常关闭服务reload - 重新加载配置文件,不会中断当前请求的处理reopen - 重新打开日志文件
等待工作进程完成请求后停止nginx进程,从容停止:
1 [root@localhost ~]# nginx -s quit
还可以使用Unix工具(如kill utility),将信号直接发送给某个 ID 的进程。默认情况下,启动nginx后,主进程的进程ID写入 /opt/local/nginx/logs/ 或 /run/ 目录下的 nginx.pid:
kill 命令
1 2 3 4 5 6 7 [root@localhost ~]# ps -ef | grep nginx root 4718 23794 0 17:38 pts/0 00:00:00 grep --color=auto nginx root 25877 1 0 17:10 ? 00:00:00 nginx: master process nginx nginx 25878 25877 0 17:10 ? 00:00:00 nginx: worker process # 发送QUIT信号给进程25877,使其从容停止 [root@localhost ~]# kill -s QUIT 25877 [root@localhost ~]# kill -s 3 25877
配置文件结构 在配置文件中可确定nginx及其模块的工作方式。默认情况下,配置文件名为 nginx.conf ,并放在目录: /opt/local/nginx/conf/ 或 /etc/nginx/ 中。
配置文件由指令 及其参数 组成。
简单指令 :由空格分隔的名称和参数组成,并以分号(;)结尾。
块指令 :作为“容器”。具有与简单指令相同的结构,但不是以分号结尾,而是以大括号( { 和 } )包围的一组附加指令结束。
上下文 :如果块指令可以在大括号内部有其他指令,则称为上下文 。例如:events上下文,http上下文,server上下文和location上下文。
主上下文 : events 、 http 、 mail 、 stream 指令驻留在主上下文 中,有且只能有一个
location 在 server 块中,server 在 http 块中。
# 号之后视为注释。
默认配置:
1 2 3 4 5 6 7 8 9 10 11 12 13 14 15 16 17 18 19 20 21 22 23 24 25 26 27 28 29 30 31 32 33 34 35 36 37 38 39 40 41 42 43 44 45 46 47 48 49 50 51 52 53 54 55 56 57 58 59 60 61 62 63 64 65 66 67 68 69 70 71 72 73 74 75 76 77 78 79 80 81 82 83 84 85 86 87 88 89 90 91 92 93 94 95 96 97 98 99 100 101 102 103 104 105 106 107 108 109 110 111 112 113 114 115 116 117 #user nobody; worker_processes 1; #error_log logs/error.log; #error_log logs/error.log notice; #error_log logs/error.log info; #pid logs/nginx.pid; events { worker_connections 1024; } http { include mime.types; default_type application/octet-stream; #log_format main '$remote_addr - $remote_user [$time_local] "$request" ' # '$status $body_bytes_sent "$http_referer" ' # '"$http_user_agent" "$http_x_forwarded_for"'; #access_log logs/access.log main; sendfile on; #tcp_nopush on; #keepalive_timeout 0; keepalive_timeout 65; #gzip on; server { listen 80; server_name localhost; #charset koi8-r; #access_log logs/host.access.log main; location / { root html; index index.html index.htm; } #error_page 404 /404.html; # redirect server error pages to the static page /50x.html # error_page 500 502 503 504 /50x.html; location = /50x.html { root html; } # proxy the PHP scripts to Apache listening on 127.0.0.1:80 # #location ~ \.php$ { # proxy_pass http://127.0.0.1; #} # pass the PHP scripts to FastCGI server listening on 127.0.0.1:9000 # #location ~ \.php$ { # root html; # fastcgi_pass 127.0.0.1:9000; # fastcgi_index index.php; # fastcgi_param SCRIPT_FILENAME /scripts$fastcgi_script_name; # include fastcgi_params; #} # deny access to .htaccess files, if Apache's document root # concurs with nginx's one # #location ~ /\.ht { # deny all; #} } # another virtual host using mix of IP-, name-, and port-based configuration # #server { # listen 8000; # listen somename:8080; # server_name somename alias another.alias; # location / { # root html; # index index.html index.htm; # } #} # HTTPS server # #server { # listen 443 ssl; # server_name localhost; # ssl_certificate cert.pem; # ssl_certificate_key cert.key; # ssl_session_cache shared:SSL:1m; # ssl_session_timeout 5m; # ssl_ciphers HIGH:!aNULL:!MD5; # ssl_prefer_server_ciphers on; # location / { # root html; # index index.html index.htm; # } #} }
静态资源服务器 示例:服务器根据不同请求从不同本地目录提供响应文件。
准备 创建 /home/data/html 目录,放入 index.html ;
创建 /home/data/images 目录,放入图像 logo.png ;
创建 /home/data/images/img 目录,也放入图像 logo.png ;
1 2 [root@localhost ~]# mkdir -p /home/data/html [root@localhost ~]# mkdir -p /home/data/images
index.html
1 2 3 4 5 6 7 8 9 10 <!DOCTYPE html > <html > <head > <meta http-equiv ="Content-Type" content ="text/html; charset=UTF-8" > <title > index</title > </head > <body > <h1 > index.html</h1 > </body > </html >
logo.png
配置 打开配置文件(/opt/local/nginx/conf/nginx.conf),注释掉所有http块,启动一个新的http块:
1 2 3 4 5 6 7 8 9 10 11 http { ## 静态网站 server { location / { # 匹配请求 http://127.0.0.1/ ,默认访问index.html或index.htm root /home/data/html; # 请求的根目录 } location /images/ { # 匹配请求 http://127.0.0.1/images/ root /home/data/; # 请求的根目录 } } }
配置文件 server 块可以配置服务器监听端口 和服务器名称 加以区分,标准端口 80。
当 nginx 决定使用哪个工作进程处理请求后,它会根据 server 块内部配置的 location 指令的参数匹配请求头中指定的URI的路径(请求地址PATH) 。对于匹配请求,根据 root 指令的参数形成本地文件系统上所请求文件的路径。 以上述配置为例,响应 http://127.0.0.1/images/logo.png 请求时,会匹配以 /images/ 路径开头的 URI 请求,请求的根目录为 /home/data/,服务器将在本地文件系统 /home/data/images 目录下寻找请求资源 logo.png 并响应请求。如果资源不存在,nginx将发送一个指示 404 错误的响应。
如果有几个匹配的 location 块,nginx 会匹配最长参数的 location 块。上面 location 块参数最短长度为 1,因此只有当所有其他 location 块不能匹配时,才会使用该块。
测试 要应用新配置 ,需将重载信号发送到nginx的主进程:
1 2 3 4 5 6 # 验证配置 [root@localhost ~]# /opt/local/nginx/sbin/nginx -t nginx: the configuration file /opt/local/nginx/conf/nginx.conf syntax is ok nginx: configuration file /opt/local/nginx/conf/nginx.conf test is successful # 重新加载配置,不会中断当前请求的处理 [root@localhost ~]# /opt/local/nginx/sbin/nginx -s reload
如果配置错误或异常导致无法正常工作,可以尝试查看目录 /opt/local/nginx/logs/ 或 /var/log/nginx/ 中的 access.log 和 error.log 文件。
访问:
http://127.0.0.1/
http://127.0.0.1/images/logo.png
http://127.0.0.1/images/img/logo.png
最终配置 完整的 nginx.conf 文件配置内容如下:
1 2 3 4 5 6 7 8 9 10 11 12 13 14 15 16 17 18 19 20 21 22 23 24 25 26 27 28 29 30 31 32 33 34 35 36 37 38 39 40 41 # user nobody; worker_processes 1; # error_log logs/error.log; # error_log logs/error.log notice; # error_log logs/error.log info; # pid logs/nginx.pid; events { worker_connections 1024; } http { include mime.types; default_type application/octet-stream; #log_format main '$remote_addr - $remote_user [$time_local] "$request" ' # '$status $body_bytes_sent "$http_referer" ' # '"$http_user_agent" "$http_x_forwarded_for"'; #access_log logs/access.log main; sendfile on; #tcp_nopush on; #keepalive_timeout 0; keepalive_timeout 65; #gzip on; ## 静态网站 server { location / { root /home/data/html; } location /images/ { root /home/data/; } } }
简单的代理服务器 代理服务器 、 反向代理
nginx的一个常见用途是将其设置为反向代理服务器,代理服务器在接收客户端发送的请求后转发给 目标/源 服务器,从 目标/源 服务器返回的响应经过代理服务器后再传给客户端。
下面配置一个基本的代理服务器,它为来自本地目录的文件提供图像请求,并将所有其他请求发送到目标服务器。在此示例中,两个服务器将在单个 nginx 实例上定义。
配置目标服务器 添加一个 server 块来定义目标服务器:
1 2 3 4 5 6 7 8 # server { listen 8080; root /home/data/proxy; # 当location块不包含root指令时使用 location / { } }
这是一个监听端口 8080 的简单服务器,并将所有请求映射 到本地文件系统上的 /home/data/proxy 目录。
注意 root 指令位于 server 块上下文中,当匹配用于服务请求的 location 块不包含自己的 root 指令时,将使用此 root 指令。
创建 /home/data/proxy 目录,放入 proxy.html :
1 2 3 4 5 6 7 8 9 10 <!DOCTYPE html > <html > <head > <meta http-equiv ="Content-Type" content ="text/html; charset=UTF-8" > <title > proxy</title > </head > <body > <h1 > proxy</h1 > </body > </html >
配置代理服务器 添加一个 server 块来定义代理服务器:
1 2 3 4 5 6 7 8 9 10 11 12 13 # server { listen 8081; location / { # proxy_pass指令将请求传递给配置的URL。 proxy_pass http://127.0.0.1:8080; } location ~ \.(gif|jpg|png)$ { root /home/data/images; # 请求的根目录 } }
第二个 location 块的参数是一个正则表达式,匹配所有以 .gif ,.jpg 或 .png 结尾的URI。
先匹配指定参数的 location 块,记住最长参数的一个;然后检查正则表达式,如果与正则表达式匹配,nginx会选择此 location ,否则选择之前记住的那一个。
测试 将重载信号发送到nginx的主进程:
1 2 3 4 5 6 # 验证配置 [root@localhost ~]# /opt/local/nginx/sbin/nginx -t nginx: the configuration file /opt/local/nginx/conf/nginx.conf syntax is ok nginx: configuration file /opt/local/nginx/conf/nginx.conf test is successful # 重新加载配置,不会中断当前请求的处理 [root@localhost ~]# /opt/local/nginx/sbin/nginx -s reload
访问:
http://127.0.0.1:8080/proxy.html
http://127.0.0.1:8081/proxy.html
http://127.0.0.1:8081/logo.png
http://127.0.0.1:8081/img/logo.png
最终配置 完整的 nginx.conf 文件配置内容如下:
1 2 3 4 5 6 7 8 9 10 11 12 13 14 15 16 17 18 19 20 21 22 23 24 25 26 27 28 29 30 31 32 33 34 35 36 37 38 39 40 41 42 43 44 45 46 47 48 49 50 51 52 53 54 55 56 57 58 59 60 61 62 63 64 # user nobody; worker_processes 1; # error_log logs/error.log; # error_log logs/error.log notice; # error_log logs/error.log info; # pid logs/nginx.pid; events { worker_connections 1024; } http { include mime.types; default_type application/octet-stream; #log_format main '$remote_addr - $remote_user [$time_local] "$request" ' # '$status $body_bytes_sent "$http_referer" ' # '"$http_user_agent" "$http_x_forwarded_for"'; #access_log logs/access.log main; sendfile on; #tcp_nopush on; #keepalive_timeout 0; keepalive_timeout 65; #gzip on; ## 静态网站 # server { # location / { # root /home/data/html; # } # location /images/ { # root /home/data/; # } # } ## 源服务器 server { listen 8080; root /home/data/proxy; location / { } } ## 代理服务器 server { listen 8081; location / { proxy_pass http://127.0.0.1:8080; } location ~ \.(gif|jpg|png)$ { root /home/data/images; } } }
进程和运行时控制 主进程和工作进程 nginx有一个主进程 和几个工作进程 。如果启用缓存,缓存加载程序 和缓存管理器进程 也将在启动时运行。
主进程 主要作用是读取和评估配置文件以及维护工作进程。
工作进程 对请求进行实际处理。 nginx采用基于事件的模型和依赖于操作系统的机制来有效地在工作进程之间分配请求。 工作进程的数量可在 nginx.conf 配置文件中修改,worker_processes auto; 表示自动调整为可用CPU内核数(请参阅worker_processes )。
控制nginx 相信你已经阅读了 启动、停止、重新加载配置 。
主进程 ID 可以使用 pid 指令在 nginx.conf 文件中进行更改。主进程支持以下信号:
TERM, INT - 快速关闭QUIT - 正常关闭HUP - 改变配置,跟上改变的时区(仅适用于FreeBSD和Linux),使用新配置启动新的工作进程,正常关闭旧的工作进程 USR1 - 重新打开日志文件USR2 - 升级可执行文件WINCH - 正常关闭工作进程
个别工作进程可以用信号来控制,尽管这不是必需的。 支持的信号有:
TERM, INT - 快速关闭
QUIT - 正常关闭
USR1 - 重新打开日志文件
WINCH - 调试异常终止(需要启用debug_points)
为了使 nginx 重新读取配置文件,应将 HUP 信号发送到主进程。 主进程首先检查语法有效性,然后尝试应用新配置,即打开日志文件和新的监听套接字。 如果失败,它会回滚更改,并继续使用旧配置。 如果成功,它将启动新的工作进程,并向旧的工作进程发送消息,请求它们正常关闭。旧工作进程密切监听套接字,并继续为旧客户端服务。 在所有客户端被服务之后,旧的工作进程被关闭。
配置文件 相信你已经阅读了 配置文件结构 。
为了使配置更易于维护,建议您将其拆分为存储在 /opt/local/nginx/conf/conf.d/ 或 /etc/nginx/conf.d/ 目录中的一组功能特定文件,并在主 nginx.conf 文件中使用 include 指令引用(包函)指定文件的内容。如下所示:
1 2 3 include conf.d/http; include conf.d/stream; include conf.d/exchange-enhanced;
http 为 /opt/local/nginx/conf/conf.d/ 或 /etc/nginx/conf.d/ 目录下的文件名,其内容是从 nginx.conf 中拆分出来的 http 块,例如:
1 2 3 4 5 6 7 8 9 10 http { server { location / { root /home/data/html; } location /images/ { root /home/data/; } } }
几个用于不同流量类型 的指令(有且只能有一个
这些指令都可以包含多个 **server上下文(server块)**来定义控制请求处理的虚拟服务器。不同流量类型的 server 块内的指令有所不同。
对于HTTP流量 (http上下文),每个 server 指令控制处理来自特定端口的资源请求,server 上下文中的多个 location 指令定义了如何处理特定的 URI 集合。
对于 mail 和 stream 流量 (mail 和 stream 上下文),每个 server 指令控制处理来自特定TCP端口或UNIX套接字的资源请求。
对于大多数指令,子上下文 可以 继承 和 覆盖 父上下文 指令的值。 有关上下文遗留的更多信息,请参阅proxy_set_header 指令的文档。
配置Web服务器 配置 server 虚拟服务器由 http 上下文中的 server 指令定义,且至少包含一个 server 指令来定义虚拟服务器。
listen 指令服务器侦听请求的 IP 和 port(或Unix域套接字和路径)。
如果省略端口,则使用标准端口。
如果省略 IP 地址 ,服务器将侦听所有 IP 地址 。
如果不包含 listen 指令,则“标准”端口为 80/tcp ,“default”端口为 8000/tcp ,具体取决于超级用户权限。
1 2 3 4 5 6 7 # 下面的示例监听127.0.0.1:8080。还可以监听其他本机ip,例如:内网和公网ip。 # 监听vps的公网ip会失败:Cannot assign requested address。因为这并不是本机ip,而是vps厂商的内部路由 # 使用内网ip(192.168.3.77)访问:Failed connect to 192.168.3.77:8080; Connection refused server { listen 127.0.0.1:8080; # The rest of server configuration }
server_name 指令服务器侦听请求的域名,多个域名空格分隔 。参数可以是 完整名称、通配符(*)、正则表达式 。
如果有多个 server 块与请求的 IP 和 port 相匹配,则将根据 server 块中的 server_name 指令值匹配请求的域名。
请求域名匹配优先级: *.example.orgmail.*
如果有多个 server 块与请求的 IP 和 port 相匹配,每个 server 块的 server_name 与请求的域名都不匹配,就会将请求路由到匹配 IP 和 port 的 默认服务器 (default_server )。若未明确指定默认服务器,则将第一个 server 块作为默认服务器(按照出现在配置文件中的顺序)。
示例 创建 /home/data/html/vhost1 目录,放入 index.html ;
1 2 3 4 5 6 7 8 9 10 <!DOCTYPE html > <html > <head > <meta http-equiv ="Content-Type" content ="text/html; charset=UTF-8" > <title > vhost1</title > </head > <body > <h1 > vhost1</h1 > </body > </html >
创建 /home/data/html/vhost2 目录,放入 index.html ;
1 2 3 4 5 6 7 8 9 10 <!DOCTYPE html > <html > <head > <meta http-equiv ="Content-Type" content ="text/html; charset=UTF-8" > <title > vhost2</title > </head > <body > <h1 > vhost2</h1 > </body > </html >
创建 /home/data/log 目录,放入 vhost1.com.log 和 vhost2.com.log ;
编辑 /etc/hosts 新增内容:
1 2 127.0.0.1 vhost1.com www.vhost1.com 127.0.0.1 vhost2.com www.vhost2.com
配置示例,两个虚拟服务器,分别对应两个域名,第二个服务器设置为默认服务器:
1 2 3 4 5 6 7 8 9 10 11 12 13 14 15 server { listen 9001; server_name vhost1.com www.vhost1.com; index index.html index.html; root /home/data/html/vhost1; access_log /home/data/log/vhost1.com.log; } server { listen 9001 default_server; server_name vhost2.com www.vhost2.com; index index.html index.html; root /home/data/html/vhost2; access_log /home/data/log/vhost2.com.log; }
测试访问:
http://vhost1.com:9001 ,访问匹配的 server_name ,返回 vhost1 的主页。
http://www.vhost1.com:9001 ,访问匹配的 server_name ,返回 vhost1 的主页。
http://www.vhost2.com:9001 ,访问匹配的 server_name ,返回 vhost2 的主页。
http://vhost2.com:9001 ,访问匹配的 server_name ,返回 vhost2 的主页。
http://127.0.0.1:9001 ,无匹配的 server_name ,访问默认服务器,返回 vhost2 的主页。
http://106.12.173.48:9001 ,无匹配的 server_name ,访问默认服务器,返回 vhost2 的主页。
http://localhost:9001 ,无匹配的 server_name ,访问默认服务器,返回 vhost2 的主页。
配置 location 相信你已经阅读了 静态资源服务器 和 简单的代理服务器 。
location 指令有两种类型的参数:前缀字符串(路径名)和正则表达式。 对于要匹配路径名的请求URI,必须以路径名开头
选择处理请求的 location 的确切逻辑:https://www.yiibai.com/nginx/nginx-web-server.html
使用变量 可以使用配置文件中的变量,使NGINX进程的请求根据定义的情况而有所不同。 变量是在运行时计算的命名值,用作指令的参数。 一个变量由它的名字开头的 $ (美元)符号表示。 变量根据NGINX的状态定义信息,例如正在处理的请求的属性。
有许多预定义的变量, 如核心HTTP变量,您可以使用 set ,map 和 geo 指令定义自定义变量。 大多数变量在运行时计算的,并包含与特定请求相关的信息。 例如,$remote_addr 包含客户端IP地址,$uri 保存当前的URI值。
返回特定状态码 一些网站 URI 需要立即返回具有特定错误或重定向代码的响应,例如当页面被暂时移动或永久移动时,最简单的方法是使用 return 指令。
return 指令可以包含在 location 和 server 上下文中。
1 2 3 return code [text]; return code URL; return URL;
1 2 3 4 5 6 7 8 9 10 11 12 13 14 location /blog { # 返回永久移动,并重定向 return 301 https://blog.jonsnows.com/about/; } location /blog { # 返回未找到的404状态码 return 404; } location /blog { # 返回服务器内部错误 return 500; }
重写URI请求 实现 URI 重写的指令 rewrite ,格式:
1 rewrite regex replacement [flag];
regex:必须
replacement:必须 $index 来捕获分组。正则捕获组 https://blog.csdn.net/lxcnn/article/details/4146148 https://dailc.github.io/2017/08/01/regularExpressionConcepts.html
flag:非必须 last: 本条规则匹配完成后,继续搜索与重写的 URI 匹配的 location 。浏览器地址栏不变break: 本条规则匹配完成即终止,取消搜索与重写的 URI 匹配的 location 。浏览器地址栏不变redirect: 返回 302 临时重定向,爬虫不更新 URI 。浏览器地址栏改变permanent: 返回 301 永久重定向,爬虫更新 URI 。浏览器地址栏改变当 replacement 以 http:// 或 https:// 开头,无论 flag 为何值(有值或无值) ,都会停止处理后续内容,并直接302重定向(redirect)返回给客户端。
可以在 location 和 server 上下文中包含多个 rewrite 指令,nginx 按照它们发生的顺序逐个执行,匹配到一个 rewrite 指令就不再继续匹配。
last 和 breaklocation 块外:
当出现在 location 块外时,两者的作用是一致的没有任何差异,都会跳过当前上下文的后续指令,搜索与重写的 URI 匹配的 location 。
当 flag 省略且 replacement 不以 http:// 或 https:// 开头,则 flag 默认值可以看做 last 或 break,因为无差异。
location 块内:
last - 跳过当前上下文的后续指令;再次进入 server 块,继续搜索与重写的 URI 匹配的 location ,并执行新 location 中的 rewrite 指令(URI可以再次更改,往下继续匹配)。跳出 location 作用域。break - 跳过当前上下文的后续指令;取消搜索与重写的 URI 匹配的 location 。不会跳出 location 作用域。当 flag 省略且 replacement 不以 http:// 或 https:// 开头,则 flag 默认值为 last。
redirect 和 permanent从实现功能的角度上去看,redirect 和 permanent 是一样的,不存在好坏,也不存在性能问题。但类似SEO(或百度爬你的网站时),会对你到底是永久性重定向还是临时重定向感兴趣。
简单示例 1 2 3 4 5 6 7 8 9 10 11 12 13 14 15 16 17 18 19 20 21 # 请求1: http://106.12.173.48:8082/download/resources/img/logo.png # 请求2: http://106.12.173.48:8082/download/resources/pic/logo.png # 请求3: http://106.12.173.48:8082/download/logo.png server { listen 8082; rewrite ^/download/(.*)/img/(.*)\.(.*)$ /$1/img/$2.$3 permanent; # 请求重写 http://106.12.173.48:8082/resources/img/logo.png rewrite ^/download/(.*)/pic/(.*)\.(.*)$ /$1/pic/$2.$3 permanent; # 请求重写 http://106.12.173.48:8082/resources/pic/logo.png rewrite ^/download/(.*) /resources/$1 permanent; # 请求重写 http://106.12.173.48:8082/resources/logo.png # return 403; # last和break标志会跳过后续指令,但在location中rewrite后可能会执行return。 location /images/ { root /home/data/; } location /resources/ { # rewrite ^/resources/img/(.*)$ $scheme://$server_addr:$server_port/images/$1; rewrite ^/resources/img/(.*)$ /images/$1 permanent; # 请求重定向到 http://106.12.173.48:8082/images/logo.png rewrite ^/resources/pic/(.*)$ /images/$1 permanent; # 请求重定向到 http://106.12.173.48:8082/images/logo.png rewrite ^/resources/(.*) https://www.baidu.com/$1 permanent; # $1:捕获匹配正则的第二组参数。请求重定向到 https://www.baidu.com/logo.png } }
重写HTTP响应 ngx_http_sub_module模块是一个过滤器,通过将一个指定的字符串替换为另一个字符串来修改响应。该模块已经内置在nginx中,但默认未安装,安装需要加上配置参数:--with-http_sub_module。
1 2 3 4 5 6 7 8 9 10 11 12 13 14 15 16 17 18 19 20 21 22 23 24 [root@localhost nginx-1.26.3]# ./configure --prefix=/opt/local/nginx \ --pid-path=/opt/local/nginx/run/nginx.pid \ --with-http_ssl_module \ --user=nginx \ --group=nginx \ --with-http_ssl_module \ --with-http_v2_module \ --with-http_auth_request_module \ --with-http_stub_status_module \ --with-http_gzip_static_module \ --with-http_realip_module \ --with-http_sub_module \ --with-http_addition_module \ --with-http_flv_module \ --with-http_mp4_module \ --with-http_dav_module \ --with-http_secure_link_module \ --with-http_degradation_module \ --with-stream \ --with-stream_ssl_module \ --with-pcre \ --with-threads \ --with-file-aio \ --with-http_slice_module
当需要重写或更改HTTP响应中的内容时,例如将一个字符串替换为另一个字符串,可以使用 sub_filter 指令。该指令支持变量和替代链,使更复杂的更改成为可能。
sub_filter_once 指令告诉 nginx 在一个 location 内是否连续使用 sub_filter 伪指令(替换一次或全部替换)。
示例一:
1 2 3 4 location / { sub_filter /blog/ /blog-staging/; sub_filter_once off; # 全部替换 }
示例二:
1 2 3 4 5 location / { sub_filter 'href="http://127.0.0.1:8080/' 'href="http://$host/'; sub_filter 'img src="http://127.0.0.1:8080/' 'img src="http://$host/'; sub_filter_once on; # 替换一次 }
处理错误 使用 error_page 指令可以 返回自定义错误页面 、替换响应中的错误代码 、重定向到其他 URI 。
1 2 3 4 5 6 7 8 9 10 11 12 13 14 15 location / { # root /home/data/html; root html; error_page 404 /50x.html; # 返回自定义错误页面 error_page 404 =200 /50x.html; # 替换响应中的错误代码,产生404时返回200,内容为50x.html。 error_page 404 =301 https://www.baidu.com; # 重定向的方式处理错误页面 # 应用访问量过大时可能导致nginx返回50x错误,将静态页面返回给用户也是一种在极端情况下比较合适的降级方案。 error_page 500 502 503 504 @jump_to_error; } location @jump_to_error { lua_code_cache on; content_by_lua_file /error.html; }
error_page 在一次请求中只能响应一次。recursive_error_pages ,默认为 off ,作用是:启用或禁用使用 error_page 指令进行多次重定向。此类重定向的数量是有限的。
配置静态内容服务器 根目录和索引文件 root 指令指定用于搜索文件的根目录,nginx 将请求 URI 附加到 root 指令指定的路径。该指令可以放置在 http ,server 或 location 上下文中。 server 上下文中的 root 指令适用于不包括 root 指令的所有 location 块。
1 2 3 4 5 6 7 8 9 10 11 12 13 server { root /home/data/; location / { } location /images/ { } location ~ \.(mp3|mp4) { root /home/data/media; } }
如果请求以 /images/ 开头 ,nginx 会在文件系统的 /home/data/images/ 目录中搜索文件;但如果 URI 以 .mp3 或 .mp4 扩展名结尾,则 nginx 会在 /home/data/media 目录中搜索 .mp3 或 .mp4 文件。
如果请求以斜杠结尾 ,则 nginx 将其视为对目录的请求,并尝试在目录中找到索引文件 。
index 指令定义索引文件的名称 (默认值为 index.html )。可以在 index 指令中列出多个索引文件名,nginx 以指定的顺序检查索引文件是否存在;检查方式是将索引文件的名称附加到 URI 后面,然后对 URI 内部重定向(发起新的 location 搜索),请求可能会在另一个 location 中结束。nginx 以指定的顺序检查索引文件是否存在,并返回第一个找到的文件。示例:
1 2 3 4 5 6 7 8 9 location / { root /home/data; index index.html index.php; } location ~ \.php { proxy_pass localhost:8000; ... }
解释:如果请求中的 URI 是 /path/ ,并且 /home/data/path/index.html 不存在,但是 /home/data/path/index.php 存在,则会将 /path/index.php 内部重定向映射到第二个 location 。 最后,请求被代理。
尝试几个选项
Syntax:
try_files file ... uri;try_files file ... =code;
Default:
—
Context:
server, location
按指定顺序检查文件是否存在,并使用找到的第一个文件进行请求处理;该处理在当前上下文中执行。文件的路径是根据 root 和 alias 指令从 file 参数构造的。可以通过在名称末尾指定斜杠来检查目录是否存在,例如“ $ uri /”。如果未找到任何文件,则将进行内部重定向到最后一个参数中指定的uri。
最后一个参数可以指向一个 location ,也可以是状态码。例如:
1 2 3 4 5 6 7 8 9 10 11 12 13 14 15 16 17 18 19 20 21 server { listen 80; root html; error_page 400 /40x.html; error_page 500 /50x.html; location / { # try_files /system/maintenance.html @mongrel; # try_files /system/maintenance.html /40x.html; # try_files $uri /images/default.gif; # try_files $uri $uri/index.html $uri.html =500; } location = /images/default.gif { expires 30s; } location @mongrel { proxy_pass http://www.baidu.com; } }
Nginx优化 百万并发下 Nginx 的优化之道
Nginx 优化配置及详细注释
Nginx 高并发下的优化
Nginx-性能优化
反向代理 相信你已经阅读了 简单的代理服务器 。
http://nginx.org/en/docs/http/ngx_http_proxy_module.html
https://www.yiibai.com/nginx/reverse-proxy.html
压缩和解压 http://nginx.org/en/docs/http/ngx_http_gzip_module.html
https://www.yiibai.com/nginx/compression-and-decompression.html
内容缓存 介绍 当启用缓存时,nginx 将响应缓存到临时文件,并使用它们来响应客户端,而不必每次都为同一内容代理请求。
启用响应缓存 在 http 上下文中包含 proxy_cache_path 指令。
path 参数定义缓存路径。
keys_zone 参数定义共享存储区的名称和大小(所有活跃的 keys 和有关数据的信息都存储在共享存储区中)。
1 2 3 http { proxy_cache_path /data/nginx/cache keys_zone=one:10m; }
然后在要缓存服务器响应的上下文( http ,server 或 location )中包含 proxy_cache 和 proxy_cache_valid 指令,
1 2 3 4 5 6 7 8 9 10 11 12 http { proxy_cache_path /data/nginx/cache keys_zone=one:10m; server { proxy_cache one; # proxy_cache_valid 60m; proxy_cache_valid 24h; location / { proxy_pass http://localhost:8000; } } }
请注意,由 keys_zone 参数定义的大小不会限制缓存的响应数据量。要限制缓存的响应数据量,请将 max_size 参数包含到 proxy_cache_path 指令中。
其他 https://www.yiibai.com/nginx/content-caching.html
配置日志 https://www.yiibai.com/nginx/logging-and-monitoring.html
设置错误日志 、 设置访问日志
主要应用场景 https://www.yiibai.com/nginx/nginx-main-use-scenes.html
反向代理:ngx_http_proxy_module
负载均衡:ngx_http_upstream_module
HTTP服务器(包含动静分离)
正向代理
模块 ngx_http_auth_basic_module 该模块允许通过使用”HTTP 基本身份验证”协议验证用户名和密码来限制对资源的访问。
1 2 3 4 5 6 7 8 9 10 11 12 13 14 15 16 17 18 19 20 21 22 yum install httpd-tools dnf install httpd-tools 。####################### htpasswd 创建密码文件,它会交互式要求你输入密码。####################### htpasswd -c /opt/local/nginx/conf/.htpasswd zhaolq htpasswd /opt/local/nginx/conf/.htpasswd lanqi ll -a /opt/local/nginx/conf cat /opt/local/nginx/conf/.htpasswdzhaolq:$apr1$fQK6V /ct$QqBO6WZ3kEsQ2MDGhItWt . lanqi:$apr1$hHwzChNV$63MFKfXDeTebbpCc2OCT ./ chown nginx:nginx /opt/local/nginx/conf/.htpasswdchmod 644 /opt/local/nginx/conf/.htpasswd